


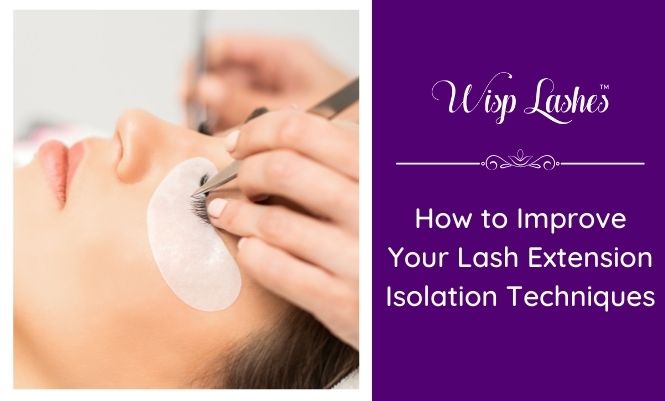
If you are a professional eyelash extensions technician, one of the most critical aspects of your job is creating beautiful, isolated lashes. To create stunning lash looks, you need to isolate each lash perfectly. If you’re struggling with isolation techniques or want to take your skills to the next level, this post is for you! Keep reading to know some top tips on improving your lash extension isolation techniques to create beautiful, long-lasting lash extensions that your clients will love.
Why is Proper Isolation Technique Important?
Prevent Dreaded Lash Stickies
Lashes are no exception. They, too, have a lifespan. They grow, fall out, and regrow in their cycles. Therefore, it’s essential to be gentle with them during the extension process to maintain the health of your client’s lashes.
Lashes will stick together when you don’t correctly isolate extensions while attaching them, resulting in lash stickies.
When one of the lashes is about to fall out, it may pull on one that is just beginning to develop, resulting in injury. Over time, this can permanently damage the lashes’ structure and possibly even bald regions. This is unsightly, but it’s also painful for the client.
To avoid all of these problems, you must take the time to properly isolate each lash before attaching the classic set eyelash extension.
Isolate Your Way to a Stunning Design
Another benefit of a good isolation strategy is that each lash is in a distinct stage of development and has a different length and width. If you ignore good isolation, the entire design may be ruined.
Because your lashes aren’t flawless and uniform, separating each one for extension application ensures that you get the ideal size and form of extension lash for each natural lash.
This gives you control over the design, allowing you to create a truly stunning look tailored to your client’s lashes.
Take Your Skills to the Next Level
Of course, your abilities as a lash artist will improve with time. However, you’ll only improve and get better with time if you spend some time on your isolation technique at the beginning of your career as a lash technician.
Lash extensions require a great deal of precision and speed.
Focus on only clean isolation and proper positioning at first.
Then, use a timer to see how long it takes you to complete a full set of lashes. Time yourself again and again until you can beat your record.
The more you practice, the perfect you will become at achieving clean, isolated lashes on time.
Types of Isolation Techniques
Let’s look at some of the methods for isolating like a pro now.
Double-Handed Isolation Technique
The name is quite obvious, but you utilize both hands to isolate lashes using the double-handed isolation approach.
If you’re right-handed, using only your left hand to separate the lashes might be difficult at first. Feel free to utilize the right hand while isolating with one hand until you can do so without assistance.
The point is that you’re using both hands equally to grab the base of the lashes and pull them apart. This lash isolation method is ideal for beginners.
Using a Guide Lash Technique
If an itty bitty natural lash gets caught in your isolation (and on your nerve), use a guide lash to free it. Then, attach a 0.07mm thick extension to the natural lash. The isolation will be considerably simpler because you can now see and set aside the little lash.
The bonded extension will not last long since this natural lash is thin and short. However, it should help you through the process by extending your still-attached extensions.
Working in Layers Technique
You’ve probably heard the phrase “layer separation technique” lately, and you’re curious about it.
Our natural lashes are two to three vertical layers (up to five for those with a lot of hair).
Working your way vertically towards the roots might be beneficial if you’re having trouble horizontally separating lashes. This method is helpful when performing volume eyelash extensions. This can be accomplished by taping one layer of lashes at a time.
How to Isolate and Apply Lashes by Layer?
- Make a piece of tape longer than the width of the client’s eye. Attach another layer of the tape facing the adhesive side so that the lashes aren’t tugged. Tape is not meant to pull or bend the lashes but rather to keep them in place.
- If your customer’s lashes are particularly short, leave a little of the adhesive exposed so that it may pull up the short ones.
- Use tape to hold the lashes up.
- Remove one layer of natural lashes from the taped region using tweezers.
- Eyelash extensions are applied to the natural lashes that have been released.
- Release the next layer of natural lashes in the same manner.
- If you find that your client has a lot of short or sparse lashes, don’t hesitate to fill in any gaps with individual lashes.
- Repeat this process until you’ve applied all of the extensions to all lashes’ layers.
Best Lash Extension Isolation Tweezers
Avoid using an incorrect tweezer: During the lash isolation, you must perform a series of delicate grasping/un-gripping motions. If you use the wrong type of tweezer, this process will be more complicated than it has to be. So the isolation tweezers should be light and free of excessive tension on the grip.
Tips for Proper Isolation
Lash isolation is one of the most critical steps in the lash extension application process. If not done correctly, the lash extension will not have anything to adhere to and will eventually fall off. Here are some tips to help you achieve the perfect isolation:
Practice
The more you practice, the more skilled you will become. We hear this constantly, and for a reason: it’s true! To improve your ability to isolate, isolate, isolate, you must isolate repeatedly.
If you can’t get a live model, start by practicing on one layer of fake lash and work your way up to three layers.
Before You Go on, Make Sure the Adhesive is Dry
If you’re careless enough not to allow the glue to dry when attaching a lash extension, your hard work will go to waste. Always double-check that the adhesive is completely dry before isolating the next lash.
Don’t Be in a Rush to Make Progress
Yes, you want to get the job done as quickly as possible. But if you’re rushing, you’re more likely to make mistakes. Take your time, and value quality over quantity.
Final Verdict
Lash isolation is a crucial step in the lash extension application process. If not done correctly, the lash extension will not have anything to adhere to and will eventually fall off. As a professional eyelash extensions technician, you may enhance your lash extension isolation methods and provide your customers with the ideal pair of lashes by following the suggestions in this post.